Most people buy the harness first and plan the outing second. That order is backwards. A harness is a restraint worn on the body of a prey animal, and the birds you see sitting calmly on a shoulder at a festival got there over weeks of patient groundwork — not over a weekend.
Since 2015 we have hosted, engineered, and produced roughly 80 bird talk shows from our Kansas City studio. Trainer guests, including Yvonne Patterson Burbach of the Wings of Love bird shows, return again and again to the preparation behind a bird that works in front of a crowd.
This article collects the desensitization sequence those guests describe, from the first time a bird sees the harness through wearing it outdoors. Target training is the prerequisite; our target training article covers it, so we won't repeat it here.
What a Harness Is Actually For (and What It Will Not Fix)
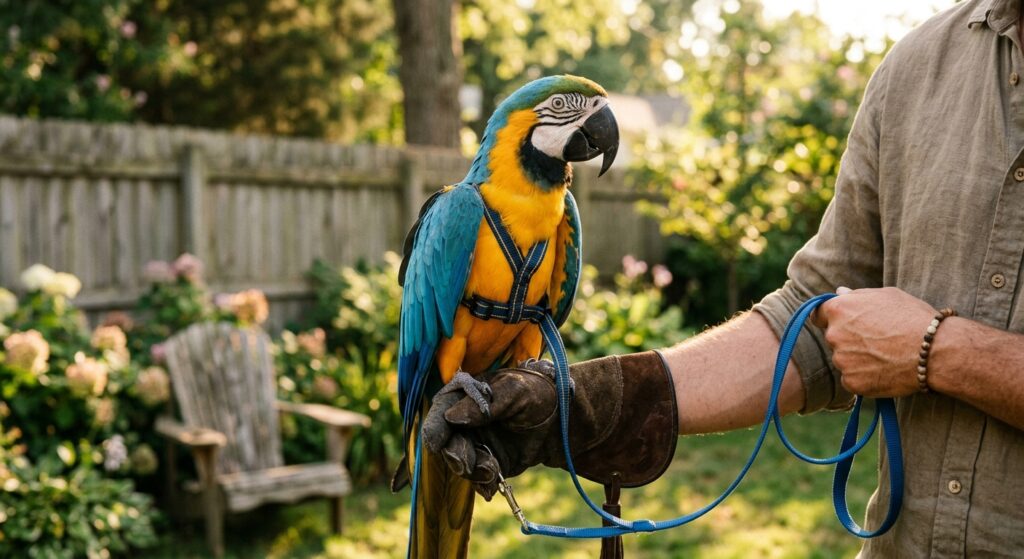
A Containment Tool, Not a Training Shortcut
A harness is a piece of safety equipment. It keeps a bird physically attached to you when you step outside, and that is the whole job. It does not make a bird tamer, calmer, more affectionate, or more cooperative. In the conversations we have recorded with professional bird keepers and trainers over the years — including the show trainers who work birds in front of live audiences — the same prerequisite comes up again and again: the bird should already step up willingly, tolerate hands moving around its body, and accept being touched near the wings and chest without panic. The harness is added to a calm bird. It is not used to create one.
That ordering matters because a harness puts your hands in the two places most parrots are least comfortable having them: over the head and under the wings. If a bird is already conflicted about hands, the harness turns a daily handling session into a daily confrontation.
How This Differs From Free Flight
People sometimes treat a harness as a halfway step toward flying a bird outdoors. It is not. The two practices rest on completely different skill sets and carry different risks, which we cover in detail in our article on free flight.
| Harnessed outing | Free flight | |
|---|---|---|
| Who controls the bird's position | You, by the tether | The bird, by choice and training |
| Core prerequisite | Calm handling and body touch | Extensive recall work and flight conditioning |
| What failure looks like | Equipment slip or escape | Lost bird, predation, disorientation |
| Flight ability required | None | Strong, conditioned flight |
| Recovery if something goes wrong | Physical restraint remains attached | Depends entirely on recall and search |
A harness compensates for a bird's lack of outdoor flight skill. Free flight depends on that skill existing. Confusing the two leads people to take an unprepared bird somewhere it has no business being.
Problems a Harness Does Not Solve
Before you buy equipment, be honest about what you are actually trying to fix. A harness will not address:
- Biting — restraint usually escalates biting, because the bird learns that hands precede something it cannot escape.
- Fear of hands — the harness requires more hand contact, not less.
- Flighty startle responses — a startled bird on a tether still startles; it just hits the end of the line.
- Screaming or attention-seeking noise — unrelated behavior, often made worse by stressful outings.
- Lack of a step-up — if you cannot reliably get the bird on your hand indoors, outdoors is not the place to find out.
- Bonding or trust gaps — proximity under restraint is not the same as a bird choosing to be with you.
Each of those is a separate training project with its own timeline, and every one of them should be resolved before a harness enters the picture.
If you are reaching for a harness to manage a behavior problem rather than to safely contain an already-cooperative bird, you are using the wrong tool and will likely make the underlying problem worse.
The Readiness Checklist Our Guests Run Before Buying Anything
Before a harness ever comes out of the package, the trainers we have hosted on air tend to run the same quiet audit of the bird's existing behavior. None of it involves the harness. It is all about whether the bird already has a working, non-coerced relationship with your hands and with the training process itself.
The Four Behaviors Trainers Look For
- A reliable step-up. Not a step-up that happens when the bird is cornered on a cage door, but one the bird offers from a perch, a play stand, the floor, and your shoulder, on cue, in more than one room.
- Calm acceptance of hands near the head and wings. The bird should stay relaxed — not frozen, not leaning away, not beaking defensively — while a hand moves slowly around the neck, over the crown, and alongside the folded wing.
- Taking treats from the hand without grabbing. A bird that lunges, snatches, or mouths hard at fingers is telling you its arousal level around food is too high for close work near the face.
- A target behavior the bird will follow. A stick or finger target the bird touches and tracks gives you a way to move the bird's head and body without pushing, pulling, or restraining it.
Why a Missing Piece Stops the Process
Each prerequisite maps directly onto a moment in harness introduction. Skip one, and you will meet it again at the worst possible time — with a loop around the bird's neck.
| Missing prerequisite | What it looks like during harness introduction | Build this first |
|---|---|---|
| Inconsistent step-up | Bird will not come out of the cage once it associates your approach with the harness | Step-up on cue in three locations |
| Head and wing handling not accepted | Bird bites, thrashes, or panics the first time the neck loop passes the crown | Slow desensitization to hands near the head |
| Grabby treat-taking | Reinforcement delivery becomes the scariest part of the session | Gentle, offered taking from a flat palm |
| No target behavior | You resort to physically guiding the head through the loop | A target the bird follows for several steps |
The Readiness Test You Can Run This Week
Spend five minutes a day for a week doing nothing but these four behaviors, with no harness anywhere in the room. If all four hold steady across different days, different rooms, and slightly different moods, the bird is a reasonable candidate. If any one of them falls apart when a person walks by, when the bird is hormonal, or when you move a step closer, that is your training project — not harness introduction.
Readiness is also not permanent. Birds regress after a move, an illness, or a long gap in training, and the checklist is worth rerunning rather than assumed.
A bird that fails any one of these four prerequisites is not a slow learner — it is a bird being asked to accept restraint before it has learned that your hands are safe.
Choosing and Prepping the Harness Before the Bird Ever Sees It
Size to the Bird, Not to the Label
Harness sizing charts are organized by species name because that is the quickest shorthand a manufacturer has, but species is only a starting point. Two Amazons of the same species can differ noticeably in chest depth and neck thickness, and a heavily feathered bird can look a size larger than it measures underneath. Before you order, handle your bird and note three things: the girth around the chest just behind the wings, the circumference of the neck where a loop would actually sit, and how much keel projection there is. A harness that slips over the head easily but leaves a gap you can fit a finger-and-a-half through at the chest is not a smaller size away from safe — it is the wrong harness.
If your bird falls between sizes, order both and return one. Guessing costs more in the end, and a loose harness teaches a bird that escape is possible, which is a lesson that is very hard to un-teach.
Figure-Eight Versus Jacket Designs
Both styles show up regularly in conversations about outdoor safety, and neither is universally better. They ask different things of the bird and of the handler.
| Figure-eight style | Jacket style | |
|---|---|---|
| How it goes on | Neck loop over the head, wings through the second loop | Vest or wrap around the body, often fastened at the back or side |
| Main point of contact | Neck and chest straps | Broader panel across the back and chest |
| Typical bird tolerance | Some birds object strongly to the head loop | Some birds object to the body wrap and restricted preening access |
| Handler skill needed | More technique to put on correctly and quickly | Often simpler to fit, but more fabric to inspect |
| Best suited to | Birds already comfortable with head and wing handling | Birds that tolerate body contact better than head contact |
Pick the one your particular bird is likely to accept, not the one that looks neatest in photographs.
Inspect, Soften, and Air It Out
A new harness out of the package is stiff, slick, and smells like a factory. All three of those work against you.
- Check the hardware. Flex every buckle, slider, and ring. Anything that cracks, bends, or feels brittle goes back.
- Check the stitching. Pull firmly at each seam, especially where straps join. Loose threads or skipped stitches are a failure point under a startled bird's full weight.
- Work the straps. Run the webbing back and forth over the edge of a table, roll it, and flex it repeatedly until it drapes instead of standing up on its own.
- Wash or air it. Hand wash with plain water or air it outdoors for several days until the packaging smell is gone.
- Re-inspect after washing. Confirm nothing loosened or warped before it goes anywhere near the bird.
A bird that gets one noseful of plastic packaging smell from a stiff new harness can form a lasting aversion, so never let the first introduction happen straight out of the bag.
Stage One: Making the Harness Boring From Across the Room
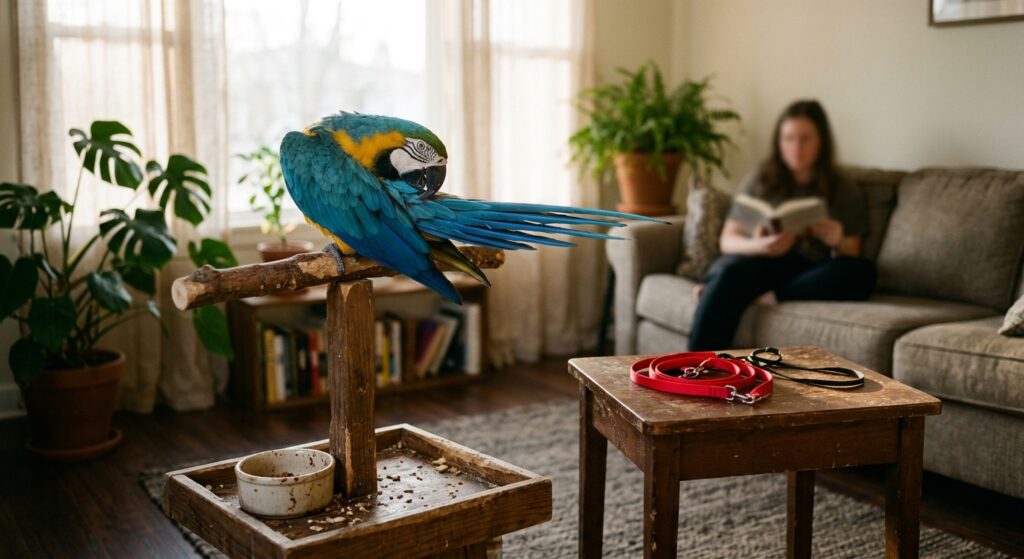
Most harness failures happen before the harness ever touches a feather. The bird decides the thing is dangerous the first time it appears, and everything after that is damage control. The goal of stage one is the opposite reaction: the harness becomes so unremarkable that your parrot stops tracking it.
Approach and Retreat, Not Approach and Hold
Set the harness somewhere visible but far enough away that your bird keeps eating, preening, or chattering normally. That distance is your starting line, and it is different for every bird — some are fine at six feet, some need the harness on the far side of the room.
From there, the pattern is simple and you repeat it for days, not minutes:
- Move the harness a few inches closer while the bird is relaxed.
- Watch for two or three seconds. If behavior stays normal, deliver a favorite food item.
- Move the harness back to where it started, or out of sight entirely.
- End the session while the bird is still calm, not after it reacts.
The retreat is the part people skip. Removing the scary object is itself a reward, and it teaches the bird that calm behavior makes the harness go away. A harness that only ever gets closer teaches the opposite lesson.
Fold It Into the Day the Bird Already Has
Desensitization works faster when the harness stops being an event. Drape it over the far end of the play stand during breakfast. Leave it on the counter while you chop vegetables. Carry it in one hand while you do the water bowls. The harness should show up during the ordinary parts of the day as often as it shows up during training.
Food delivery matters here too. Hand a treat near the harness rather than in a separate session, so the bird's own calm behavior around the object is what produced the almond or the piece of pepper.
Reading the Line You Just Crossed
Birds signal discomfort well before they bolt. Learn the early tells and you will rarely see the late ones.
| What you see | What it usually means | What to do |
|---|---|---|
| Stops eating, freezes, stares at the harness | You are at the edge of tolerance | Hold position, wait for a blink or a shift, then retreat |
| Feathers slicked tight to the body, leaning away | Already too close | Move the harness back several feet immediately |
| Pinning eyes, raised neck feathers, beak open | Fear or overstimulation | End the session, resume tomorrow at an easier distance |
| Flies off the perch or scrambles to the cage floor | You lost several days of progress | Restart at double your previous distance |
Trainers who work birds in front of crowds build in far more repetition than hobbyists expect, because a bird that has to stay composed around strangers, applause, and unfamiliar rooms cannot be rushed through the quiet part.
If your parrot has stopped eating or gone still, you are already too close — back the harness away before the freeze turns into a flight response you will spend a week undoing.
Stage Two: Touch Tolerance, Head Loops, and the Over-the-Head Moment
From Proximity to Contact: The Strap Touch
Stage One ended with the harness sitting nearby and the bird eating, preening, and ignoring it. Stage Two begins the first time the strap actually touches feathers, and that moment should be shorter than you think necessary.
Hold the harness in the hand you normally feed with. Brush the flat of the strap once against the bird's chest or the side of the beak — one contact, one second — then deliver the reinforcer and move the harness back out of the picture. Repeat in sets of three to five, with the strap retreating every single time. The pattern you are teaching is not "harness touches me" but "harness touches me and then leaves, and good things happen."
Work outward from wherever the bird is most tolerant. Most birds accept beak and chest contact before they accept anything near the nape, shoulders, or under the wing.
The Loop as a Target to Move Through
Before anything goes over the head, make the open loop a thing the bird chooses to approach. Hold the head loop open in front of you, well clear of the bird, and place a reinforcer on the far side so the beak passes through the opening to reach it. You are borrowing basic target training: the loop becomes a shape the bird moves toward rather than something that arrives on its own.
Only when the bird is reaching through without hesitation do you let the loop travel past the eyes and onto the neck.
| What you see | What it means | Your next move |
|---|---|---|
| Beak through the loop, relaxed body | Loop is a target, not a threat | Progress to brief head-through reps |
| Head turns away, beak stays shut | Not yet neutral about the loop | Return to loop-as-target reps |
| Pinning eyes, raised feathers, backing up | Over threshold | Stop the session, reinforce calm behavior |
Head-Through Reps, Wings, and the Early Finish
Head-through repetitions are the heart of this stage, and they are deliberately unsatisfying:
- Loop over the head, resting on the neck.
- Reinforce immediately — within a second.
- Remove the loop before the bird thinks about removing it.
- Pause. Let the bird eat, shake out, or step away.
Five to eight of those beat one long attempt every time. Wing handling runs on a separate track: with the harness out of sight, practice light touches along the shoulder and the folded wing, then gentle lifting, paying the bird for each. A bird that already tolerates wing contact will not panic when a strap needs to pass behind it.
End every session while the bird is still leaning in for the next rep. Quitting on a good repetition is what makes the next session easy.
The most common mistake we hear described is leaving the harness on for "just one more second" after a successful head-through — that single extra second is usually what teaches the bird to duck the loop next time.
Stage Three: First Wear, First Leash, First Door
Short Indoor Wears, Then a Dragging Leash
The first full wear should end before the bird thinks about it. Clip the harness closed, feed, and take it off inside thirty seconds. Build from there over several days — a minute, then three, then five — always ending while the bird is still calm and eating rather than when it starts chewing at the strap.
Once the harness is boring, attach the leash and let it drag on the floor while the bird walks on a play stand or the back of a chair. Do not hold it yet. The sensation of weight and the sound of a trailing line are separate lessons from wearing the vest. When you do pick it up, keep slack in it. A harness leash is a backup system, not a steering wheel, and a bird that has never felt a jerk will not learn to panic at one.
The First Door
Pick a quiet, enclosed space — a fenced yard, a garage with the door up, a car with the doors closed before the harness comes off. Go out for two or three minutes the first time. Carry the bird out on your hand against your chest, not on your shoulder, so you can catch a flinch before it becomes a flight response.
Trainers who run outdoor bird shows plan for the environment before the bird ever leaves the building. The short version of what we watch for:
| Hazard | Why it matters | What we do |
|---|---|---|
| Hawks, crows, gulls | Overhead pressure triggers bolting even in a leashed bird | Scan the sky first; go back inside if raptors are working the area |
| Loose dogs | Fastest way to turn a calm session into a thrash | Fenced space, no public parks for early sessions |
| Wind | Lifts feathers and can take a small bird off your hand | Skip gusty days entirely for the first month |
| Crowd and traffic noise | Sudden sound, not volume, is what spooks | Quiet hours only until the bird is relaxed |
Heat and cold cut sessions short. Skip hot pavement and direct midday sun, keep an eye out for open-beak panting and held-out wings, and go back in at the first sign. Cold wind on a wet bird is just as bad.
Quitting Early and Rebuilding
Abandon the session the moment the bird stops taking food, goes flat and silent, or starts chewing the harness hard. End it on your terms, carry the bird inside calmly, and do not pull on the leash.
After a genuine scare, back up two full stages — harness visible, no touching — and rebuild over a week or two. Hormonal-season regressions work the same way. A bird that wore the harness happily all winter may refuse it in spring; take the refusal at face value and return when the season passes. Once outdoor sessions are reliable, our article on traveling with a parrot covers carriers, car work, and longer trips.
A single bad outing can undo months of work, so quit the session early and voluntarily rather than pushing for one more minute outside.